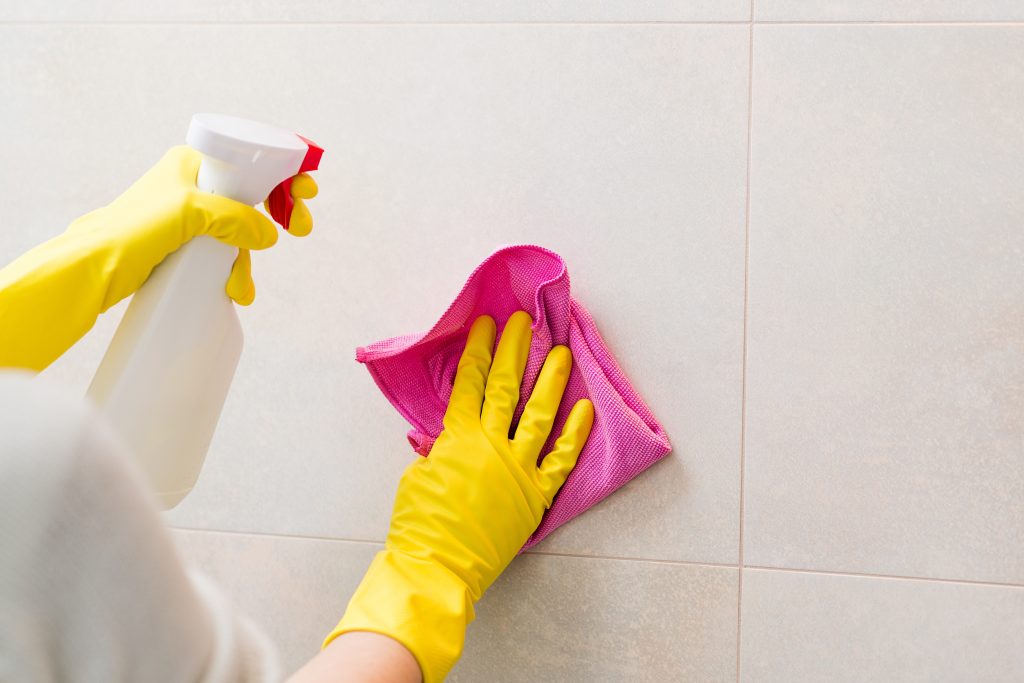
How to Clean Bathroom Tiles

The bathroom is one of the most essential rooms in the house and keeping it clean is a must for maintaining good hygiene. While cleaning the toilet, sink, and shower are typical tasks, cleaning bathroom tiles can often be neglected. However, cleaning your bathroom tiles is crucial to keeping your bathroom sparkling clean and hygienic. This article will provide you with a complete guide on how to clean bathroom tiles, with tips for cleaning all different types of tiles and keeping them looking new.

bathroom tiles cleaning

How to Clean Ceramic Tiles

Ceramic tiles are one of the most popular materials used in bathroom construction. They are durable and easy to clean making them an ideal choice for bathrooms, kitchens, and other areas prone to moisture. However, it’s important to keep them clean regularly, to prevent dirt, stains and mould from building up. To clean ceramic tiles effectively, follow the following instructions:

Step 1: Mop the Dirt Away

The first step to cleaning any floor is to remove all dirt and debris, to avoid unnecessary scratching of the surface. Take a broom or a dry mop and sweep the ceramic tile surface to ensure all dirt is gone. Microfiber mops are a popular alternative to traditional brooms and are more effective in picking up small debris.

Step 2: Mix the Cleaning Solution

There are countless cleaning products available that are specifically designed to clean ceramic tiles, but you can also make your own solution right at home. In a spray bottle, mix equal parts white vinegar and warm water, or combine a small amount of dish soap with warm water.

Step 3: Apply the Cleaning Solution

With a spray bottle, apply the cleaning solution generously over your ceramic tiles. Alternatively, you may dampen a clean towel with the solution and wipe the tiles down. The solution will break down any grime and dirt on the floor. Note that if you are cleaning tiles with natural stone, acidic solutions like vinegar may damage the surface.

Step 4: Scrub the Tiles

Some spots and stains may require some extra elbow grease to remove. If there are any areas that remain dirty, scrub them with a soft-bristled brush or a toothbrush. Be sure to rinse the area with water afterwards to ensure all soap or vinegar has been removed.

Step 5: Dry the Tiles

Finally, you will need to dry the tiles to prevent water damage and staining. Use a clean towel to wipe the ceramic tiles or wait and let them air dry completely. You may also use a clean squeegee to collect excess moisture.

How to Clean Stone Tiles

How to Clean Stone Tiles

Stone tiles can transform your home’s interior and provide a luxurious and elegant touch. However, with regular usage, these tiles can quickly become drab, stained, and dirty. It is essential to clean them regularly to preserve their sheen and longevity. Here is your step-by-step guide for a sparkling bathroom floor:

Step 1: Dust and Sweep the Stone Floor

Before starting the cleaning process, sweep the floor thoroughly to remove the dust and debris from the tiles. Use a soft-bristled broom or a vacuum cleaner to remove loose dirt, dust, and debris from the tiles’ surface. Dirt left on the tiles can cause scratches and damage to the surface. Once done, you can move on to the next step.

Step 2: Use a pH-Neutral Cleaner for Stone Floors

Stone tiles are delicate and require specialised cleaning products. We recommend using a pH-neutral cleaner suitable for natural stone. Avoid using harsh chemicals or acidic products on the tiles. Instead, use a cleaner that’s meant for stone floors as it can remove stains and dirt without causing any damage to the tiles.

Step 3: Mop the Floor

Once you’ve selected a suitable cleaning product, dilute it according to the instructions and fill your mop bucket with warm water. Dip the mop in the solution and wring out the excess water. Mop the floor, starting from the farthest corner of the bathroom and moving towards the entrance. Make sure to avoid using excess water as it can damage the tiles. If you use too much water, wipe it off immediately with a dry mop or a towel.

Step 4: Dry the Tiles

After mopping the floor, we recommend drying it off as soon as possible. Use a clean microfiber cloth or a towel to wipe off any excess water left on the surface. Make sure to remove all the moisture as it can stain or damage the tiles. We also recommend opening the windows or turning on the ventilation system to speed up the drying process.

Step 5: Seal the Tiles

Once the tiles are clean and dry, it’s time to protect them by sealing the surface. Sealing your stone tiles can prevent stains and discolouration. We recommend using a penetrating sealer that can soak into the tiles and provide long-lasting protection. Apply the sealer according to the instructions and allow it to dry completely before walking on the tiles. Remember to reapply the sealer in 6-12 months to ensure your tiles remain protected.

How to Clean Porcelain Tiles

Porcelain tiles are a popular choice for many homeowners because of their beauty, durability, and low maintenance requirements. They are non-porous, which means that they don’t absorb liquids and are resistant to staining. But like all tiles, porcelain tiles are susceptible to dirt, grime, and bacteria buildup. Proper cleaning and maintenance are crucial in ensuring that your tiles look their best and last a long time. Here is your step-by-step guide on how to clean porcelain tiles:

Step 1: Sweep or Vacuum the Tiles

The first step in cleaning your porcelain tiles is to get rid of loose debris such as dirt, dust, and pet hair. Use a soft-bristled broom or a vacuum cleaner with a soft-brush attachment to sweep or vacuum your tiles. To avoid scratching your tiles, it’s recommended that you switch to vacuum settings or adjust your broom’s bristles to avoid damage to your flooring.

Step 2: Mop the Tiles with Warm Water and Mild Soap

After removing the loose debris, the next step is to use a mop to clean your porcelain tiles. Fill a bucket with warm water (not hot), add a few drops of dish soap or another mild cleaner like vinegar or baking soda solution. Make sure your soap selection is safe for use with porcelain. Dip your mop or sponge in the warm soapy water and wring it out thoroughly.

Step 3: Focus on the Grout Lines

Grout is a porous substance that can easily attract dirt, grime, and stains. To keep your porcelain tiles looking their best, it’s essential to pay extra attention to cleaning the grout lines. Use a soft-bristled brush, like an old toothbrush, to scrub the grout lines carefully. This will help remove any dirt and buildup that could cause discolouration and make the tiles look dingy.

Step 4: Wipe with a Damp Cloth

After mopping and scrubbing, use a clean damp cloth to wipe the tiles to get rid of any residual dirt, soap, or cleaning agents. Run the cloth over the surface of the tile, using firm but gentle pressure. Make sure you change your cloth’s water or rinse and wring it out thoroughly between wipes.

Step 5: Dry Your Porcelain Tiles

To complete the cleaning process, ensure that you dry the tiles to avoid any water spots or streaks. You can use a clean and dry microfiber cloth or a dry mop to pat down the tiles gently.

How to Clean Marble Tiles

How to Clean Marble Tiles

Marble is a porous, delicate stone that is prone to scratching, staining, and damage from acidic substances. If not properly maintained, your marble floors can lose their lustre and become an eyesore. Here are some tips for cleaning your marble floor tiles like a pro, without damaging them:

Step 1: Determine Your Marble Type

The first step in cleaning your marble floor tiles is to identify the type of marble you have. Different types of marble require different cleaning techniques and products. Marble comes in various colours and grades, so it’s crucial to recognise what type of marble you have before cleaning it. Once you know the type of marble you’re working with, you can determine which cleaning solution is the best fit.

Step 2:  Sweep Your Marble Floor Regularly

Marble is prone to minor scratches, especially when dirt, grits, or other abrasive substances are tracked in from outside. Hence, to maintain your marble floor tiles, it’s important to sweep or dust them regularly. Dirt and debris can easily scratch the surface of the marble, so sweeping your floor tiles regularly is essential to keeping them clean and bright. You can use a soft bristle broom or a vacuum cleaner that is designed to be used on delicate floors.

Step 3: Use the Correct Cleaning Solution

Cleaning solutions play a vital role in preserving your marble’s natural beauty. It is crucial to use the right cleaning solution for your particular marble type. For example, you might need to avoid acidic cleaning products when cleaning marble as acidic substances damage the marble’s surface. Instead, opt for neutral-based cleaning solutions, or natural ones such as vinegar. to create a cleaning solution, add equal parts water and vinegar in a spray bottle, spray thinly on the surface of the marble and let it sit for 5-10 minutes. Then, using a soft cloth or sponge without any abrasive texture, wipe down the flooring surface thoroughly.

Step 4: Dry with Soft Towels

It is essential to dry marble quickly after cleaning to prevent water spots and avoid etching. Using a soft towel to dry your marble floor is highly recommended. Avoid dragging the cloth across the marble’s surface; instead, pat it gently until the surface is dry. If you happen to have a large marble floor area, it might help to use an electric fan to speed up your marble floor’s dryness after cleaning it.

Step 5: Seal Your Marble Flooring

Applying a sealant to your marble floors is a crucial step in preserving its natural beauty and making it less vulnerable to stains, scratches, and damage. There are many high-quality sealers available, depending on your budget and preference. For example, a penetrating sealant seeps into the marble pours and provides a long-lasting barrier to stains and other threats, while a topical sealer adds a shiny layer on top of the marble for extra protection and shine.

How Often Should You Clean Your Tiles?

The frequency of cleaning your tiles depends on various factors, such as the size of your bathroom, the number of people using it, and the amount of moisture it receives. As a general rule of thumb, it’s recommended to clean your bathroom tiles at least once a week. However, you may need to clean them more frequently if you have pets, kids, or a family member with allergies or respiratory problems.

Visit Bathroom Inspirations Dorchester Today for More Ideas!

We hope this guide was helpful, and if you need any assistance in keeping your bathroom tiles sparkling and clean, don’t hesitate to contact Bathroom Inspirations Dorchester. Our professional team can work with you to help you keep your bathroom looking new. Contact us today to schedule an appointment or to get started on your design journey, visit us at Bathroom Inspirations Dorchester.

Menu